We love a good organic tomato; preferring a home-grown and heirloom variety or from the Farmer’s Market. Growing your own food is a great activity with kids, a satisfying way to teach organic gardening and the value of feeding the soil.
Do a little research to find out which plants do best in your climate. Our incredible propagating (plant growing) friends at “Island Seed and Feed” in Goleta, help us to figure out which tomato plants did well last year and what might be better this year. Of course, the amount of rain may be too much (fungus problems) or too little. We use a drip system linked up to a controller for reliable watering even if we’re busy or away.
Ask a few local irrigation companies if you’d like recommendations for setting up a drip-irrigation system with a controller. There are many ways to do-it-yourself and with help.
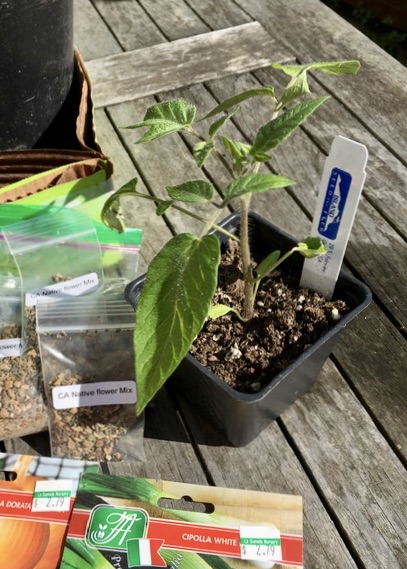
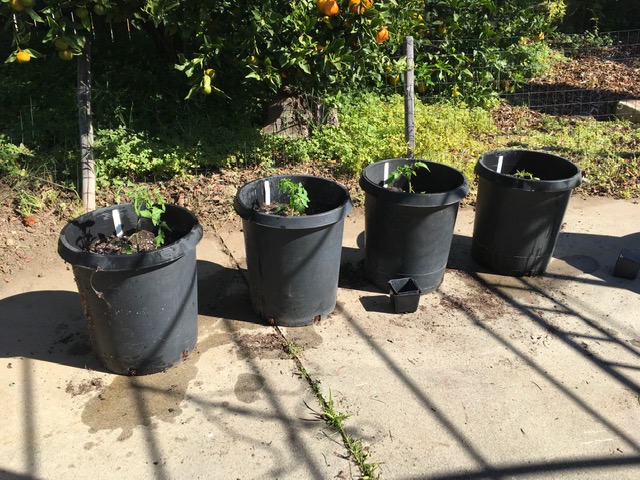
We use a good organic _potting_ soil in 15 gallon pots because the gophers will destroy our tomatoes if we plant in-ground. (Don’t reuse last year’s potted tomato soil to avoid transferring diseases; use that old soil with other non-tomato plants.) Be very cautious not to use contaminated soil or pesticides on your food plants.
Dr. N stirs in a few handfuls of organic plant food.
Then, hand waters with a B vitamin liquid + water to prevent “transplant shock.”
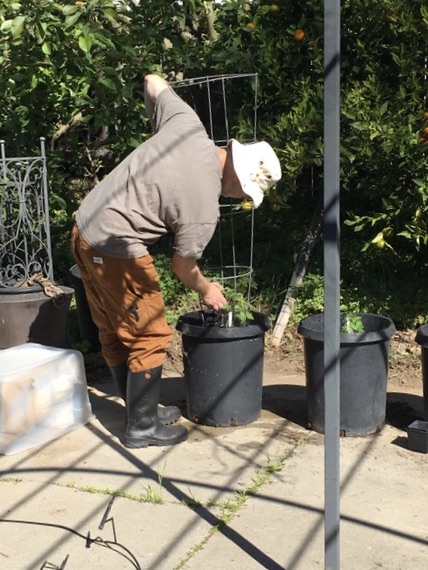
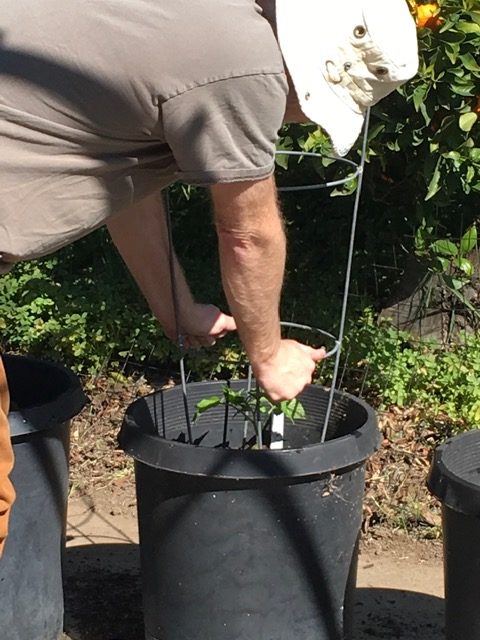
He leaves enough room at the top for an occasional deep watering by hand, and a sturdy tomato cage. He always puts the plant tag in the pot so we’ll remember which ones did well at the end of the harvest.
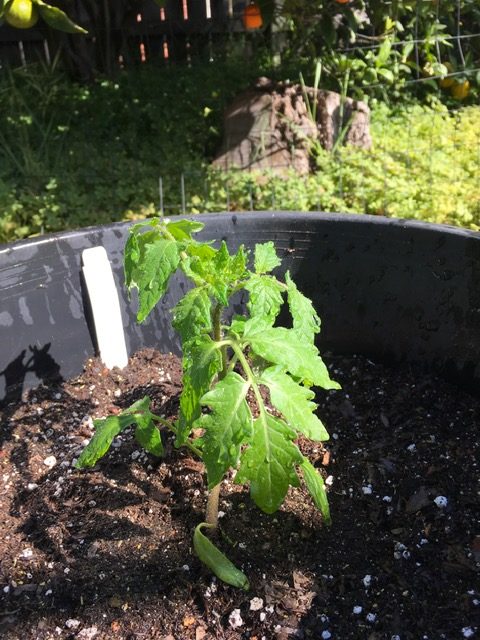
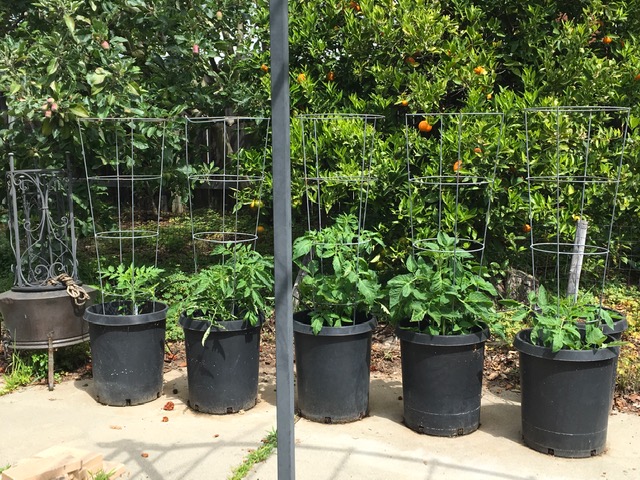
Put your tomato cages on within the first week. These seedlings will grow fast!
Just planted.
The original four tomato plants at 3 weeks and a new one on the right, at 2 weeks! Happy growing times.
Thank you for joining us as we do Pandemic Projects, meant to keep you energized, curious and learning!
Designing games with recyclable materials has got to be one of the best ways to engage the mind, invent an “interactive” that entertains the household, helps provide Environmental Awareness and gives the challenge of designing for many ages.
Give yourself and your fellow designers a few guidelines. 1) materials should be safe, clean and unbreakable, 2) games should reuse items around the house, 3) try to design for multiple ages and physical abilities, 4) games should encourage players to cooperate and provide learning times.
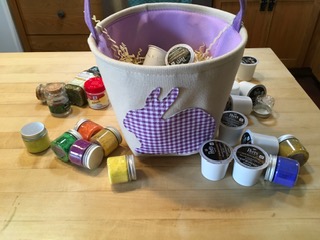
We love a good Treasure Hunt! Take turns hiding so younger players aren’t competing against each other (learning cooperation and caring). Choose items that won’t spoil if lost behind a cushion and can be reused several times. Avoid using sweets, which could attract vermin and may cause health problems down the line. Ask the chef which spice jars you may use- it’s an aggravation if the cardamom goes missing when it’s needed!
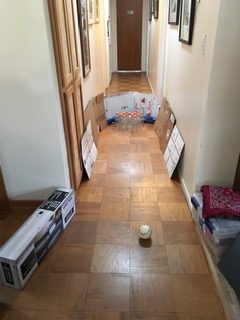
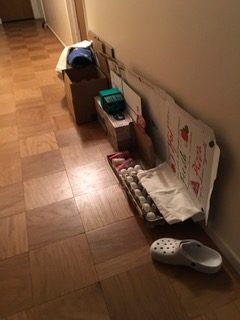
Using a hallway requires considerate planning.
Line the hallway with flattened boxes to reduce the noise and impact of balls hitting the wall. Don’t block doorways if you can help it, and, make your back board low enough that family and housemates can step around it on the way to the bathroom, kitchen or living area.
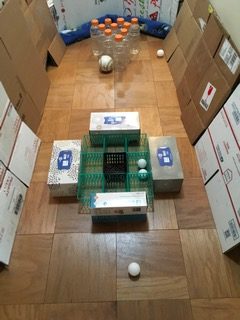
A) Bowling with empty water bottles and a softball. (Easy does it!)
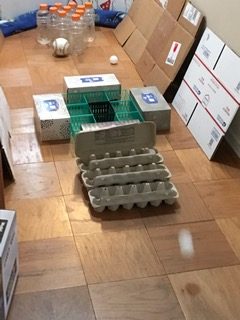
B) Bounce a Ping pong ball into Strawberry baskets.
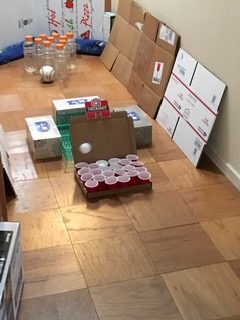
Building for Eye-Hand Coordination
C) Bounce II- Egg cartons are easier for youngsters to be successful. But laugh with each other as the randomness of the bounces creates playful not competitive times.
D) BounceBasketball– Clean coffee K-cups give a bigger thrill under the red ‘basketball’ backboard. Plus, the balls may get stuck in the red cups. Empty yogurt cups make for an easier target.
Clean up, Clean up, Everybody Does Their Share
Encourage your players to neatly stack their recyclable games against one wall. Remember, household safetyis important. If these games will be stored for awhile, “flag” the ends with something bright white or reflective (visibility at night time) and remind housemates there’s a bit of a tripping hazard.
Thank you for joining us as we do Pandemic Projects, meant to keep you energized, curious and learning!
Enjoy this picture of a cheeky fellow visiting our neighbor’s tree. He is a Hooded Oriole who, with his mate, like to set up a nest in the Spring. This orange flowered tree is a favorite of the Orioles and the Hummingbirds.
Sometimes we take birds for granted. We think they’re always there, all the time. Unfortunately, songbirds are in decline due to serious predation by house cats, air pollution and various avian diseases like the West Nile virus. Habitat loss is another serious problem.
However, many bird species are seasonally occurring. Whether they are migrating through, stopping over or searching for nesting habitats you can study who’s here this month and who is coming soon. Sometimes fellow birders will tip you off that a rarity or unusual visitor has been spotted.
Local birders said there was an unusual Mexican Red Egret at the slough. It taught some of our local egrets to flap their wings while wading, herding little fishes into the shallow waters to become an easy dinner.
If you’d like to investigate your avian (bird) neighbors you’ll be more successful in the very early morning and late afternoon as birds are feeding. You may find them going about their business any time especially when their preferred food and fresh water is available. But, be careful not to set up a feeder or water dish where cats can attack. There should be a good 6’ clearance from shrubs or other cover where cats can hide.
A pair of binoculars (binocs) are very helpful and so are local bird guides.
Ask family and family friends if they are birders and can help you get started. Birders are great friends to have!
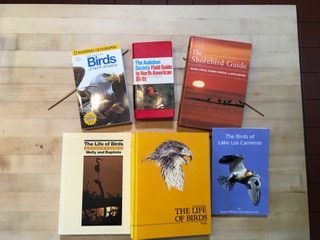
Here are some of my favorite guides and some of my favorite college level books.
Front and center: Dr. Joel Carl Welty’s famous “Life of Birds”, 3rd ed.
Left front: “Life of Birds”, 4th ed.; Dr. Welty and Dr. Baptista
Left upper row: National Geographic “Birds of North America”
Upper row, center: “Audubon Society, Field Guide to North American Birds, Western Edition”
Upper row, right: The Shorebird Guide”, O’Brien, Crossley and Karlson
Lower row, right: “The Birds of Lake Los Carneros”, Millikan and Lewis
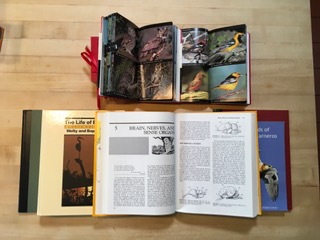
Why am I recommending “old” editions of Dr. Welty’s book? Because it’s a classic college textbook and the old editions are more affordable! Dr. Welty was my mother’s college professor. He and his wife, Susan, were wonderful and caring people.
If you read older editions, please understand that names and classifications may change or be updated as new information is discovered, but, the beautiful line drawings are priceless. Many functions, parts or situations can’t be photographed clearly enough for viewers to understand. (I used to be a Natural Science Illustrator!)
For the new birder, the color index and color photographs in the Audubon Society Field Guides are wonderfully helpful. Buy the guide new or used for your region! Often, you’ll see photos of both male and female breeding coloration which can be somewhat different than their round the year plumage. There’s plenty of information about the range where certain birds can be found, their preferred habitat, feeding habits and lots more.
I recommend that you start an informal field journal. A simple “Composition Book” with wide-ruled lines is fine. Practice your handwriting to be legible and neat so you can write your observations with an indelible (permanent ink) pen. Keep that pen and a good number 2B drawing pencil with your Field Journal and binoculars at all times. Wildlife biologists in earlier days would have used Acid-free paper and India ink in their field journals, so you’re off to a good start!
Find a good location where you can sit, comfortably, and observe the birds in the environment around your home. Call this space your “field station” or “blind” (staying hidden so birds or animals are not disturbed by your presence).
Tell your family that you are doing Science at a particular time of the day and to please not distract you as you are taking observations.
Among the many things you may want to record is the date, time of day, weather, wind and temperature. You should try to be observing at the same time of day. Note which birds are present, note what they are doing.
Start drawing as much as you can. A quick impression is just fine, birds are rarely still.
Whether living in an apartment, in the city, in the suburbs or a more rural area, your home is essentially your habitat. You are part of the local environment. Lucky city dwellers in high-rise buildings may get to see Peregrine falcons “stooping” on pigeons, catching them for dinner. Lucky hikers can sometimes see Peregrines in the windy habitat of the Chimney Rock Trail on Point Reyes, or, see Ospreys nesting on new nest platforms along Tomales Bay, CA.
Don’t be too upset if you see a bird of prey (raptor) eating its dinner. As I say to my kids, “Everybody needs to eat.”
During my ornithology (study of birds) course at University of California Santa Cruz, I didn’t see a lot of species (types) of birds at my field site as it was late in the year (no nesting going on). I was patient. One day I saw a huge dark raptor at the top of a redwood. It could only be a Golden Eagle! My classmates doubted my observation, but on later days, I saw two Golden Eagles- one flying and another on a telephone pole at sundown.
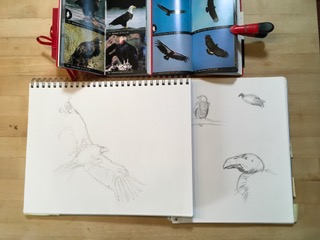
In that class, we took field trips to the Point Reyes Bird Observatory (PRBO)and the California Academy of Sciences. This was a chance to see mist-net capture of live birds, measurement and banding of their legs at PRBO. The Academy had fixed (stuffed) bird specimens. Your local Natural Science Museum will give you the chance to see fixed specimens on display. Ask if you may sit, study and draw them!
Here are some drawings that I made of a California Condor specimen at the Carrizo Plain Visitor Center, and, sketches I did of live juvenile condors at the Santa Barbara Zoo. I guess I was hooked on Condors since my early teens when I saw a giant bird with wings wider than a picnic table flying in the wild over the Central Coast of California.
Last year, we noticed folks with binocs and cameras with long lenses staring down toward a remote beach. We stopped and these friendly birders said there are Condors on the beach! Larger than big turkeys, they were walking on the beach then flying overhead!
If you get the “birding bug” you’ll have fun the rest of your life. We have friends who travel the world trying to complete their “life lists” of birds seen and heard. You can help with the Christmas Bird Count, helping observe and tally up all the species in your area.
Thank you for joining us as we do Pandemic Projects, meant to keep you energized, curious and learning!
We’re basically Midwesterners, so canning and preserving is a fundamental brainstem function for us. But more than this – we’ve been driven to it by necessity, as we can’t keep up with the amount of fruit our trees produce. But, anyone can do this; it’s creative and fun and you get to put up some jars of yummy stuff for the winter. Let’s make some jam!
In this tutorial we’ll describe the basics of how to make a cooked, processed jam from fresh fruit. This is perhaps the most complicated way to do jam. There are simpler methods, and those that require fewer special things, but if you can do this method you can do all of them.
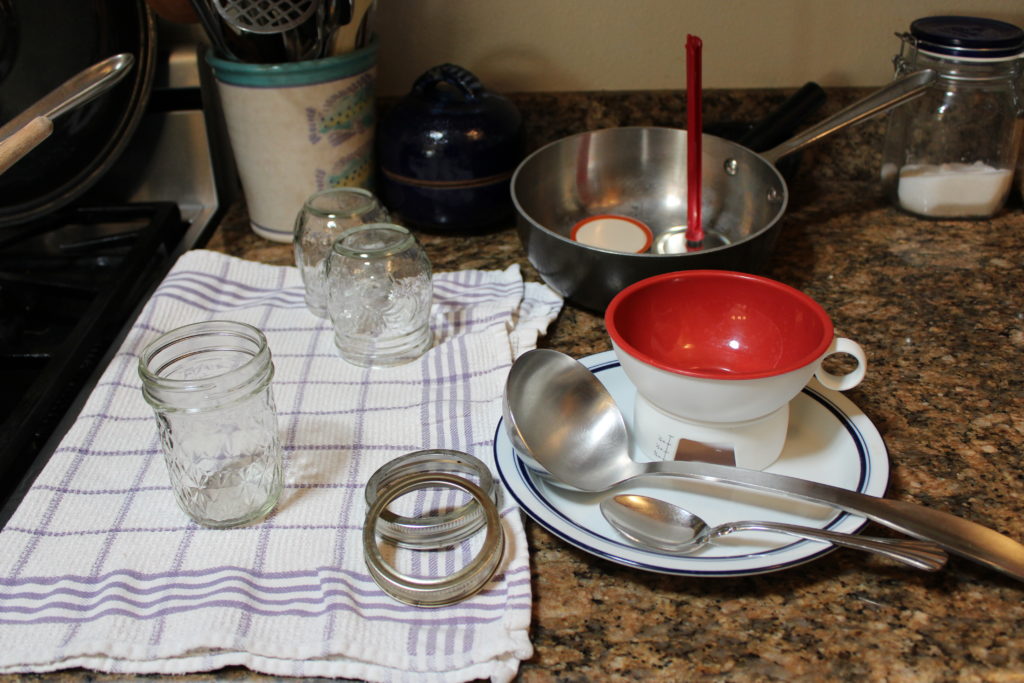
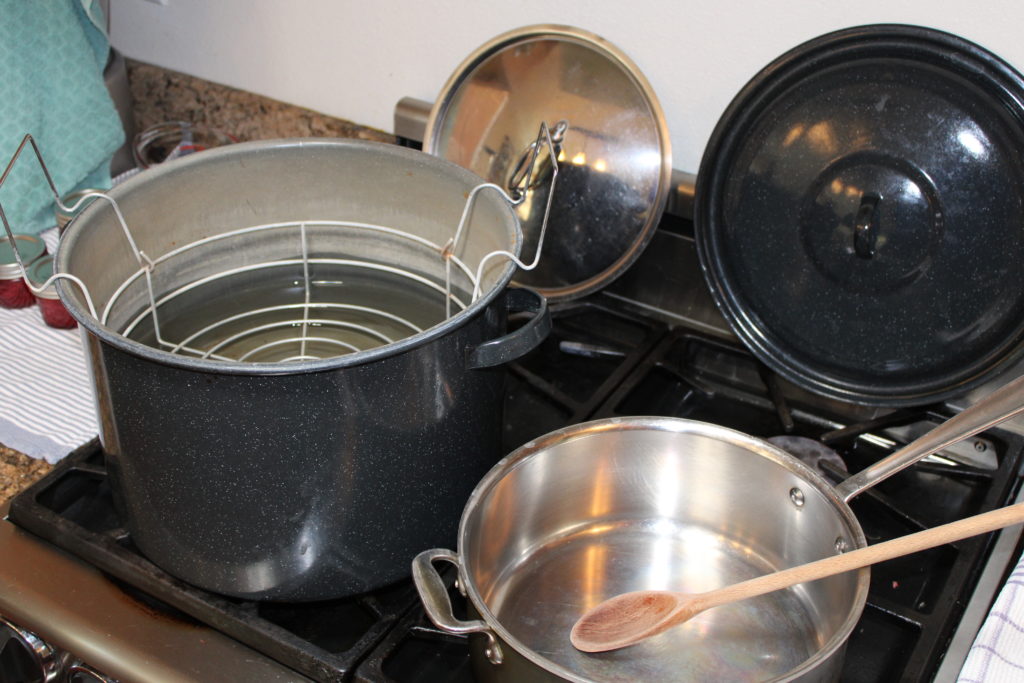
A typical setup for canning
A big pot for processing, and a smaller pot for cooking the jam
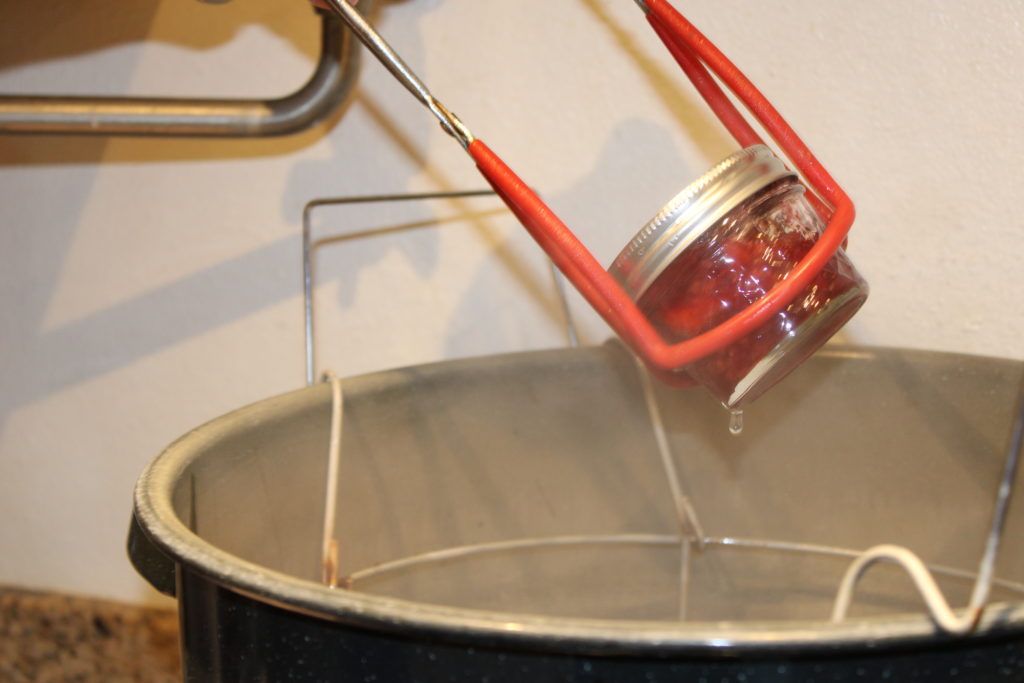
Canning tongs help with handling hot jars
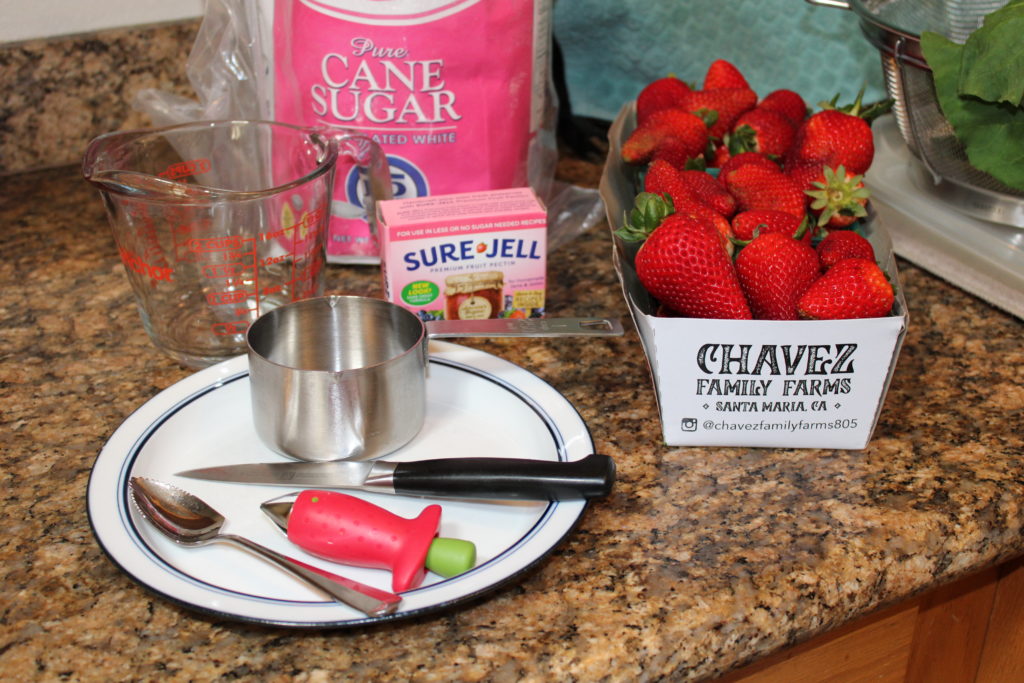
For this method, you’re going to need some stuff. In addition to the jam ingredients (fruit, granulated sugar, pectin powder), you’ll need jars, lids and rings (about $10 for a dozen pint sized jars at the supermarket or hardware store), a big stock pot that’s deep enough to boil the jars in with a couple inches of water on top, and a smaller (but still big) pot to cook your jam down in. Other things that can help tremendously but aren’t required are a canning funnel (it has a wide neck for pouring jam into jars), and a canning tongs (it’s got an odd shape but has coated wire for grabbing jars out of boiling water safely). Special “processing pots” for canning are really big and have a basket that sits inside for easily pulling out jars. You will want all this stuff if you end up doing a lot of canning, but you don’t need to acquire it all at once, and if you’re just doing small amounts you can easily make do with tools you already have in the kitchen.
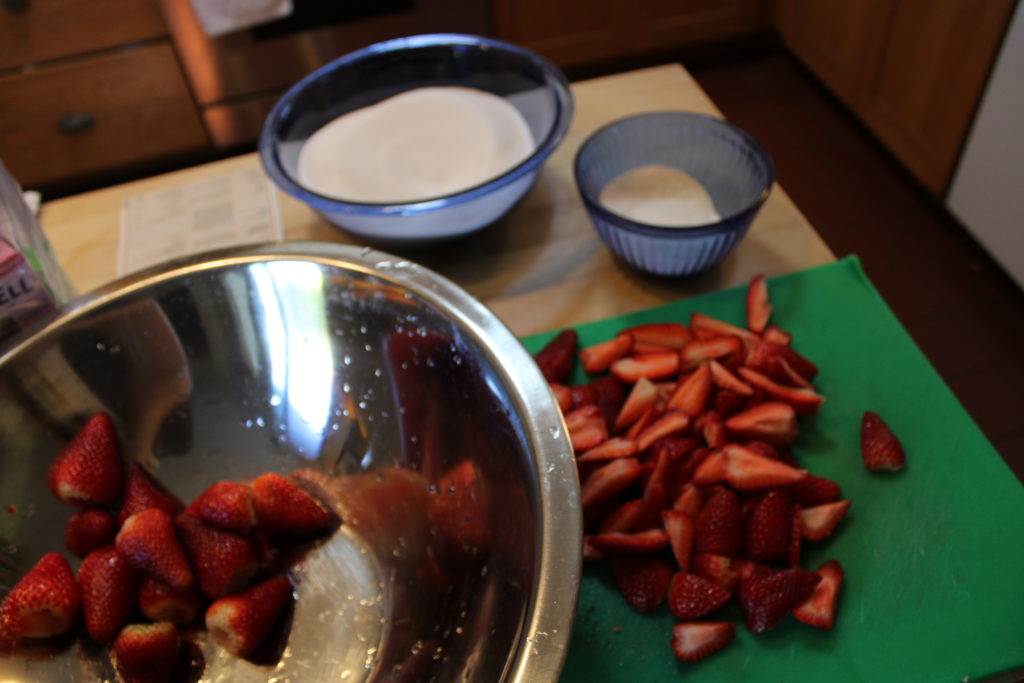
Start with fresh fruit – not too ripe, or it won’t set as well.
This year, strawberries came early to this county, so we’re going to describe how to make a batch of strawberry jam. The moves are going to be the same for different fruits, but you’ll use different amounts of fruit and sugar and maybe other ingredients depending on exactly what you’re canning. One thing we strongly recommend is to use the ‘less sugar’ recipes listed on the instructions in a “pink box” package of Sure-Jell pectin. We like to taste our fruit and its tartness and not to be overwhelmed by sugary sweetness.
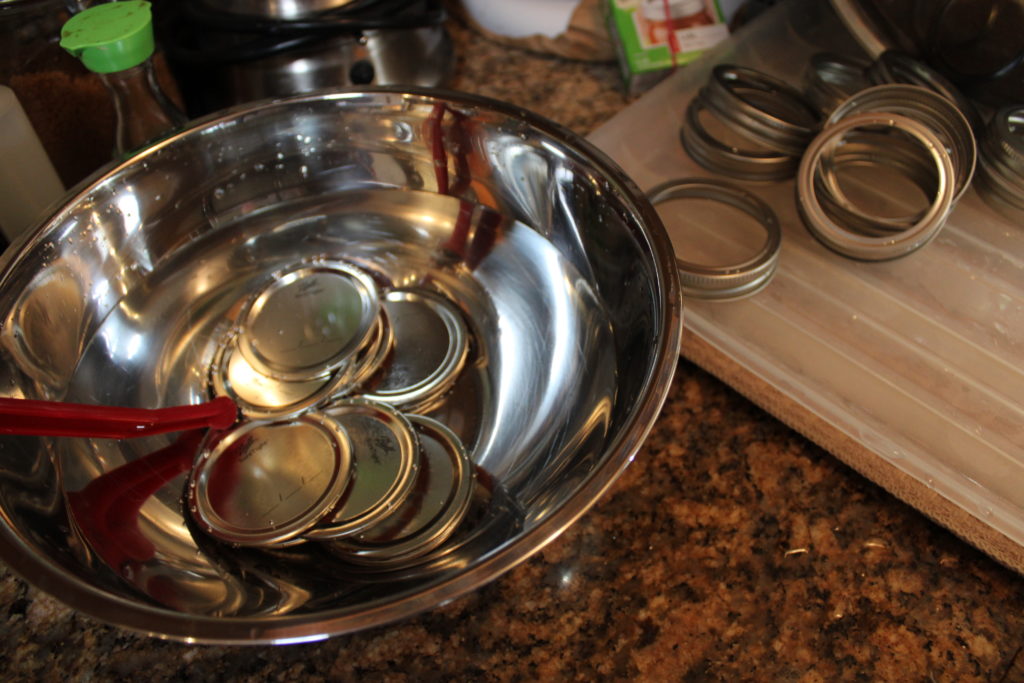
Washed lids and rings ready for canning. The red wand has a magnet on the end that makes it easy to handle lids.
Before you begin, you’ll have to wash your jars, rings, and lids. The lids have a rubber seal on the inside that works best when it’s softened a bit, so when you’re ready to jar your jam you should put the clean lids in hot water to warm the seal up.
Measure out your sugar, pectin and fruit, and have it all ready to go at once.
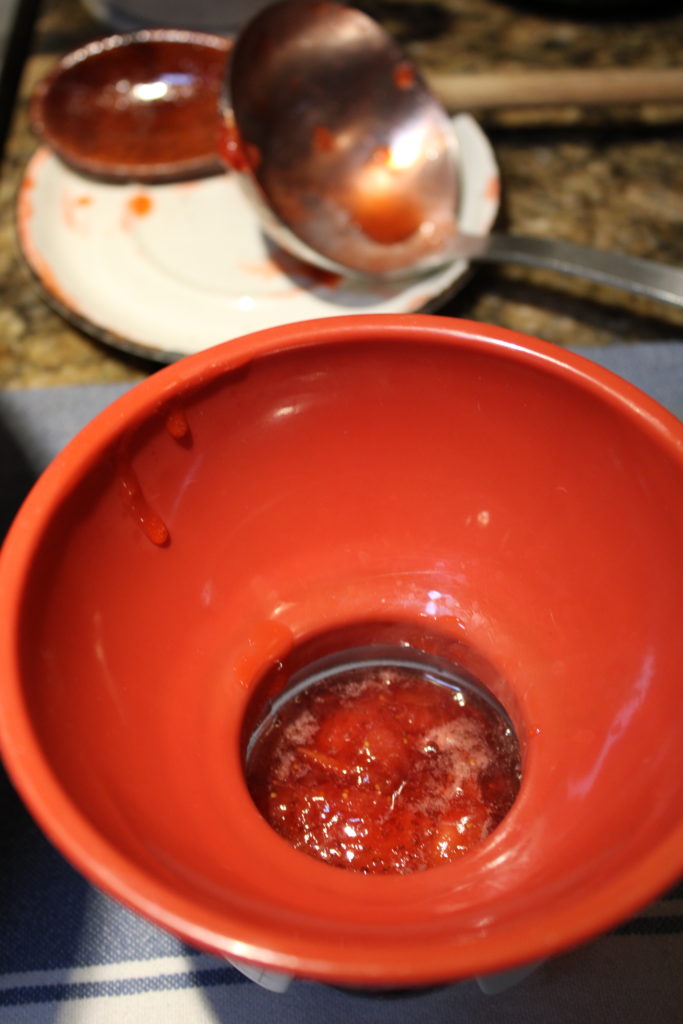
Now to the fruit. To do a batch of 8 to 10 8 ounce (half pint) jars of jam, you need around 12 cups of whole strawberries (at least five baskets), one packet of pink box Sure-Jell pectin powder, and 4 cups of granulated sugar (cane sugar is best). We like relatively early fruit – there’s a balance here between the full flavor of ripe fruit, and the better setting power and tartness of less than fully ripe fruit. A whole batch of wholly ripe fruit will not set well and might have a cloying flavor. A mix is good. Wash the fruit very well, cut off the green parts and any bad spots, and dice the fruit into 1/2 inch pieces (this isn’t critical – you can have smaller or bigger pieces if you like, so long as you can fit them into the jars). When they’re chopped they should make something like 8 cups of fruit (so this should tell you how big your cooking pot should be – like 12 cups or bigger). Mix together the packet of pectin and 1/4 cup of the sugar you have already measured, then put that mix into your cooking pot with the diced strawberries, and mix well. Mash the strawberries a bit with a potato masher to macerate them and release some of their juice.
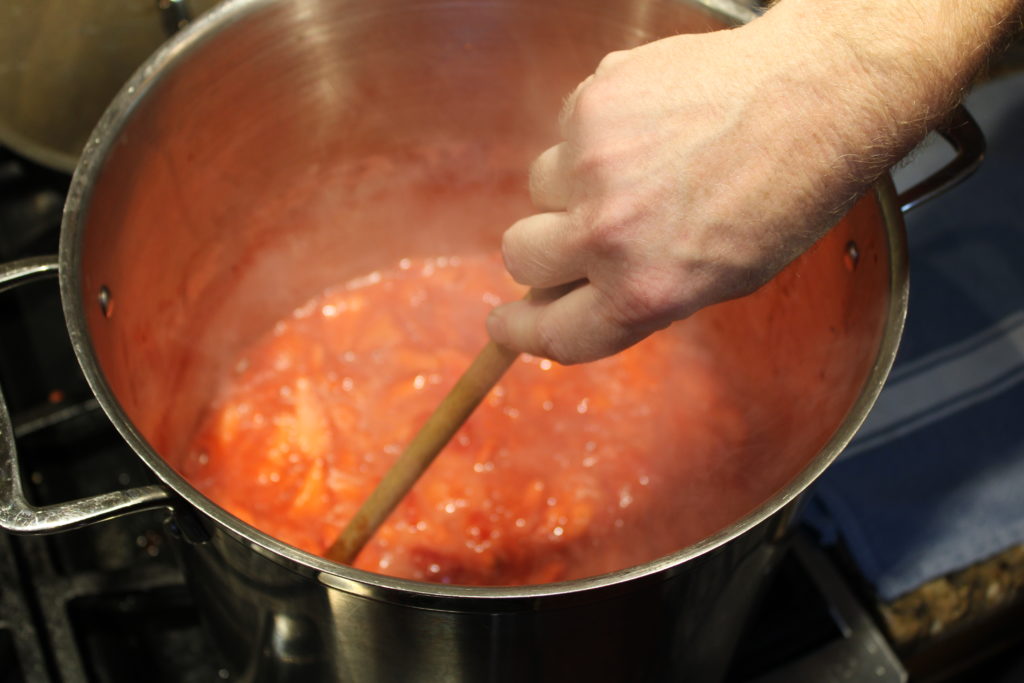
Stir constantly to prevent any burning or sticking to the pot.
Stirring in the sugar
This part requires a lot of wrist.
Now it’s time to cook the jam. Have the rest of your sugar at hand, and a kitchen timer that can give you an accurate measurement of one minute. Put in a teaspoon or so of butter if you like – this will help reduce frothing in the jam. On high heat, bring the fruit / pectin mixture to a full rolling boil – this means, the boiling doesn’t stop when you stir the mixture. This means the whole volume of the mixture is at the boiling point. Then, add the rest of your sugar (3 3/4 cups), and stir it in well. Once again, keep stirring and bring the mixture back to a full rolling boil. when it has reached the full rolling boil, start your timer and boil for exactlyone minute more. Then turn off the burner and remove the pot from the heat. Congratulations: you’ve made jam. At this point, as it cools, the jam will set into the familiar jam texture. However, you’d like to keep some for later – so your’e going to have to can it in jars and process it to prevent any spoilage. This should be done quickly while the jam is still hot!
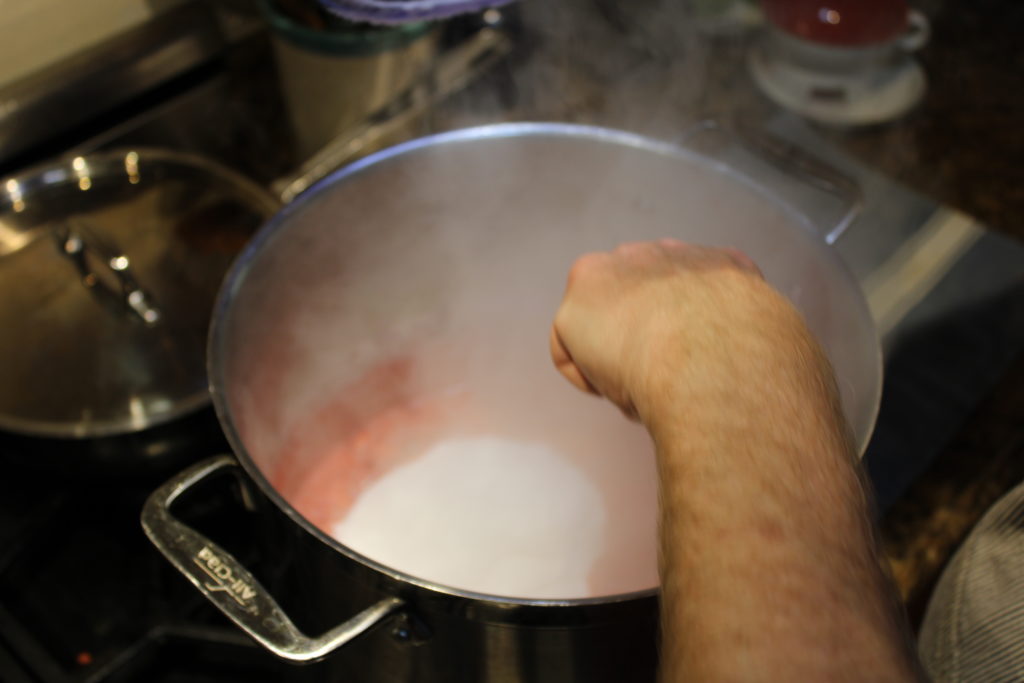
You’re going to need to have enough boiling water in your canning pot to cover your jars by an inch or two. Make sure you’ve got that going before you fill your jars. You will probably need to process more than one batch of jars, so depth is more important than width in this case. Important note: everything is going to be hot. Be careful. Getting boiling jam on your skin is painful and could cause burns (also, tasty when it cools).
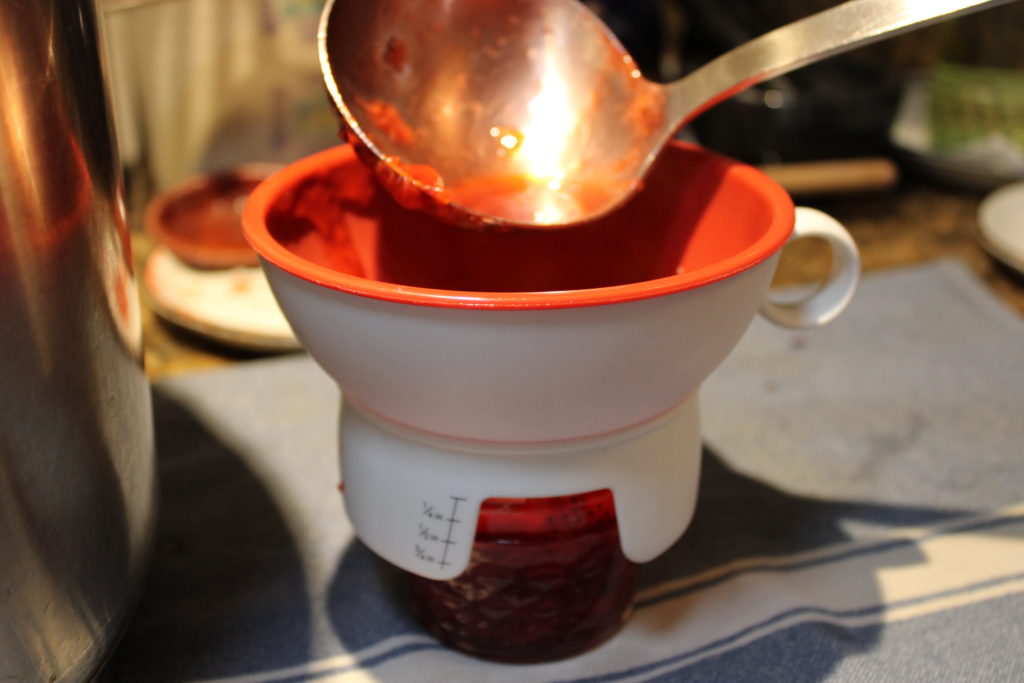
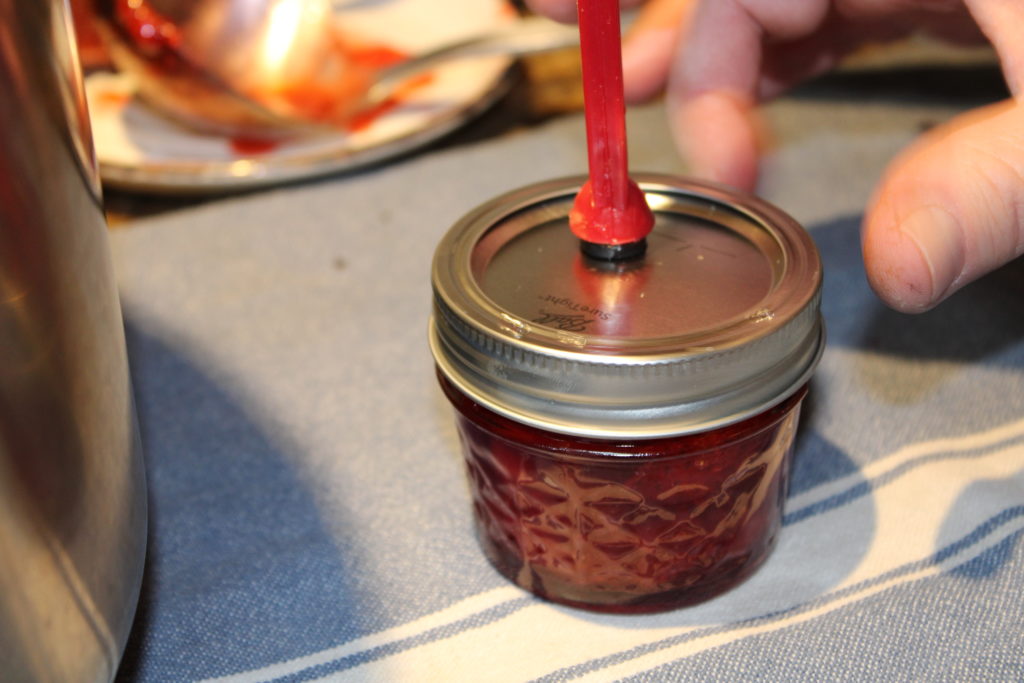
Some canning funnels have a scale on the edge to let you know how full your jar is
1/4″ headspace for this jam
Fill the jars using a ladle or spoon and the canning funnel if you have it. You’re going to need to allow some headspace between the top of the jam and the lid – for this recipe it’s about 1/4 inch, but other recipes might need more headspace. Be sure and check your recipe. Check the rim of the jar and the threads, they should be free of jam. Use a damp paper towel to clean them off if necessary. Jam on the rim of the jar could prevent a good seal. Jam on the threads could stick the ring. Place the lid on, then the ring, and tighten finger tight (not too much).
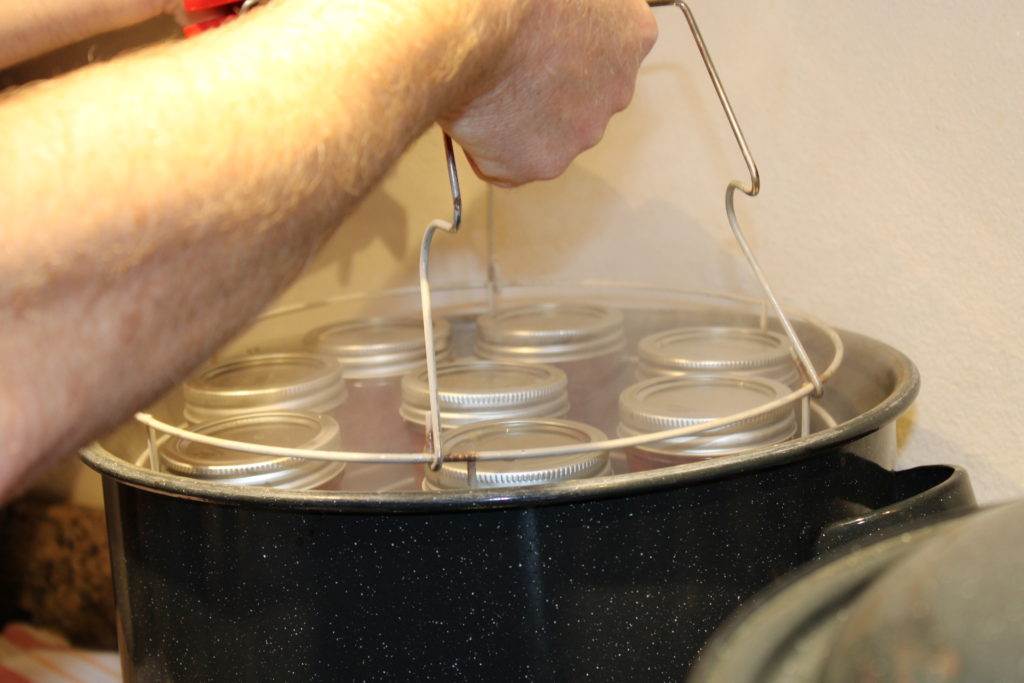
This is a big processing pot with a basket that lets you do a lot of jars at once.
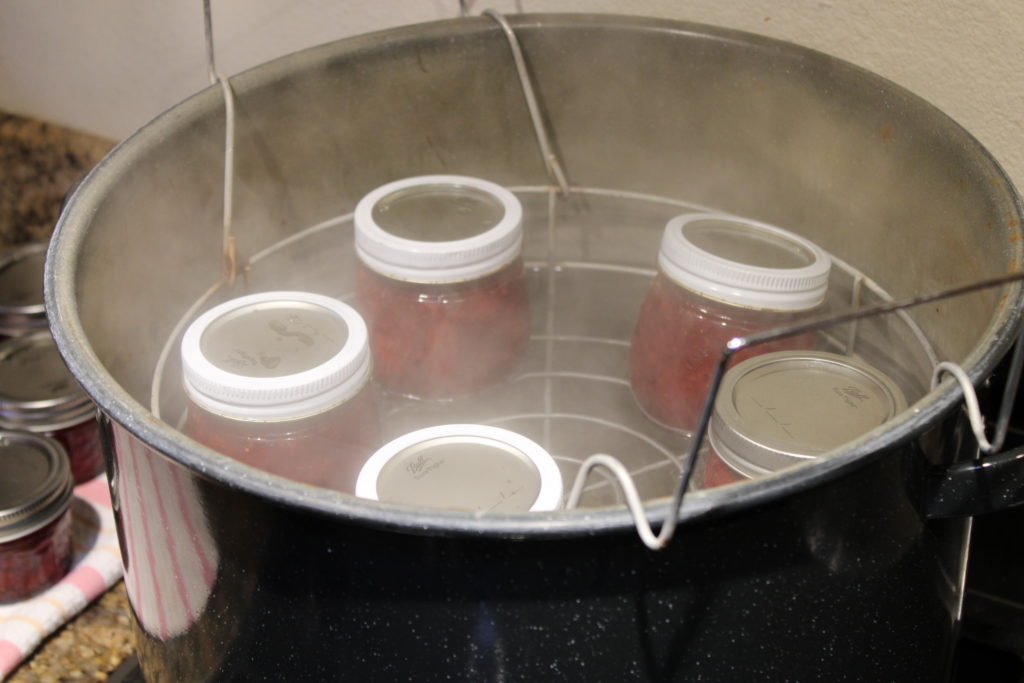
When you’ve filled enough jars to fill your processing pot, pop them into the boiling water, wait for the water to boil again, set your timer (15 minutes for this jam, but it could be 10-30 minutes depending on what you are canning). While you’re waiting for the first batch to process, you can fill the next set of jars.
When the timer goes off you can pull your jars out! If you don’t have a canning tongs you can use barbecue tongs, or silicone mitts, or a ladle – just remember the jars will be boiling hot. It helps to carefully wipe off any standing water on the top of the lid (to prevent deposits). Most of the time, as the jars cool, you will here a pop or ping sound as the lids contract and stick down to the rim to seal the lid.
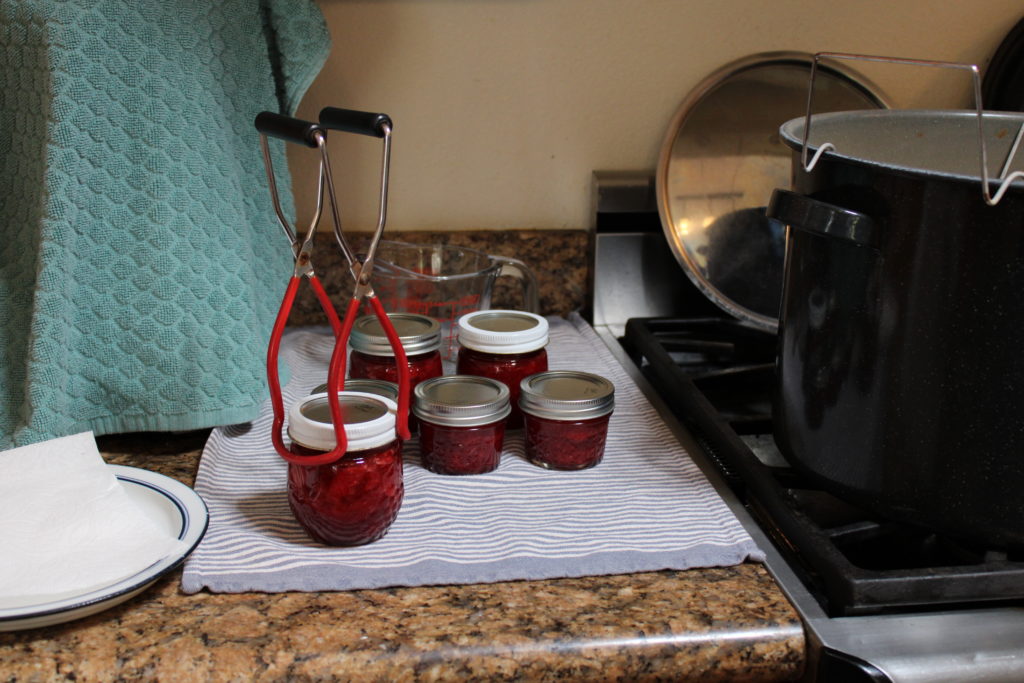
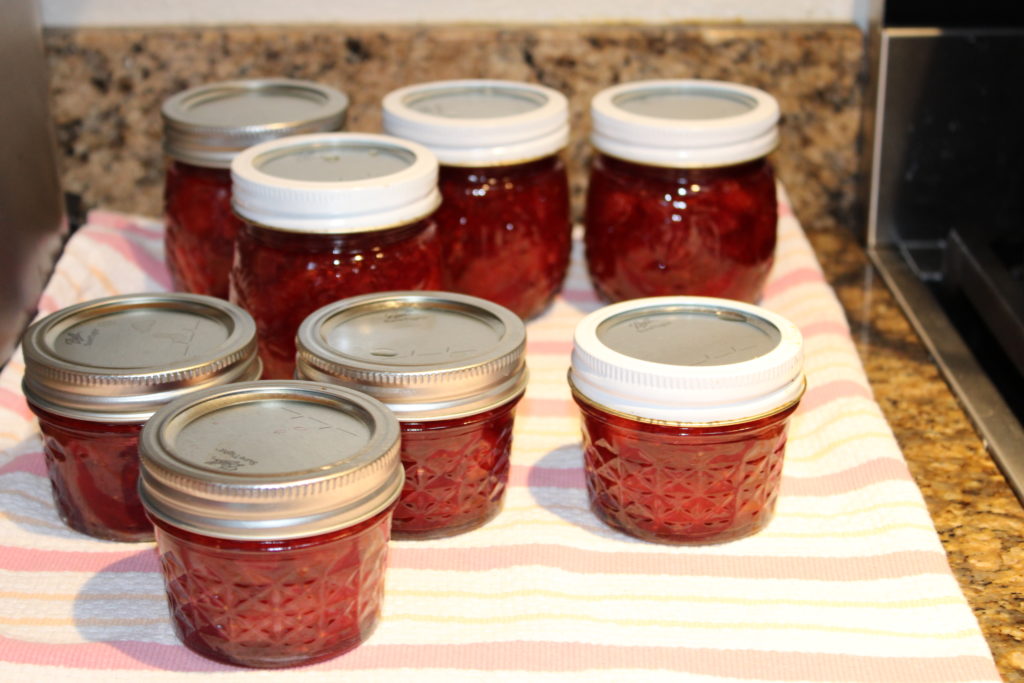
Let the jars cool. Test the jars by pressing down on the center of the lid. If it moves (pops down), the jar did not set properly, and it won’t keep. If the lid is already down, you have successfully preserved the jam. It will stay good for up to 18 months. You will notice that the hot jam is still liquid – even after it cools it will take days to set, so don’t worry if your jam seems runny, just be patient and it will be fine. When you open a jar of jam, you will need to eventually discard the lid – the seals can only be used once – but you can save the jars and rings to use again and again. Some of our jars and rings have seen ten seasons of use.
This basic procedure can be used for any number of jams: the differences between them will be the amount of fruit or sugar or pectin or other additives (like lemon juice) which will depend on the type of fruit and so forth. You can look at the directions in your packet of pectin, or you can refer to other authorities (our canning guru is Esther H. Shank, author of Mennonite Country-Style Recipes, which is an amazing cookbook includes recipes and guidelines for canning almost anything you can imagine). You don’t always need pectin to set jam or marmalade, sometimes additional cooking is all you need (but be careful or you might accidentally make candy). But something like this is how people in America have saved summer fruits and vegetables for the winter, for centuries. And as Bob Marley observed, jammin’ is not a thing of the past. Enjoy!
Thank you for joining us as we do Pandemic Projects, meant to keep you energized, curious and learning!